Payment Gateway Integration: A Complete Guide for eCommerce Websites

- 14 min read
- 3,026 words
- 16 sections
- Updated
Blog Summary
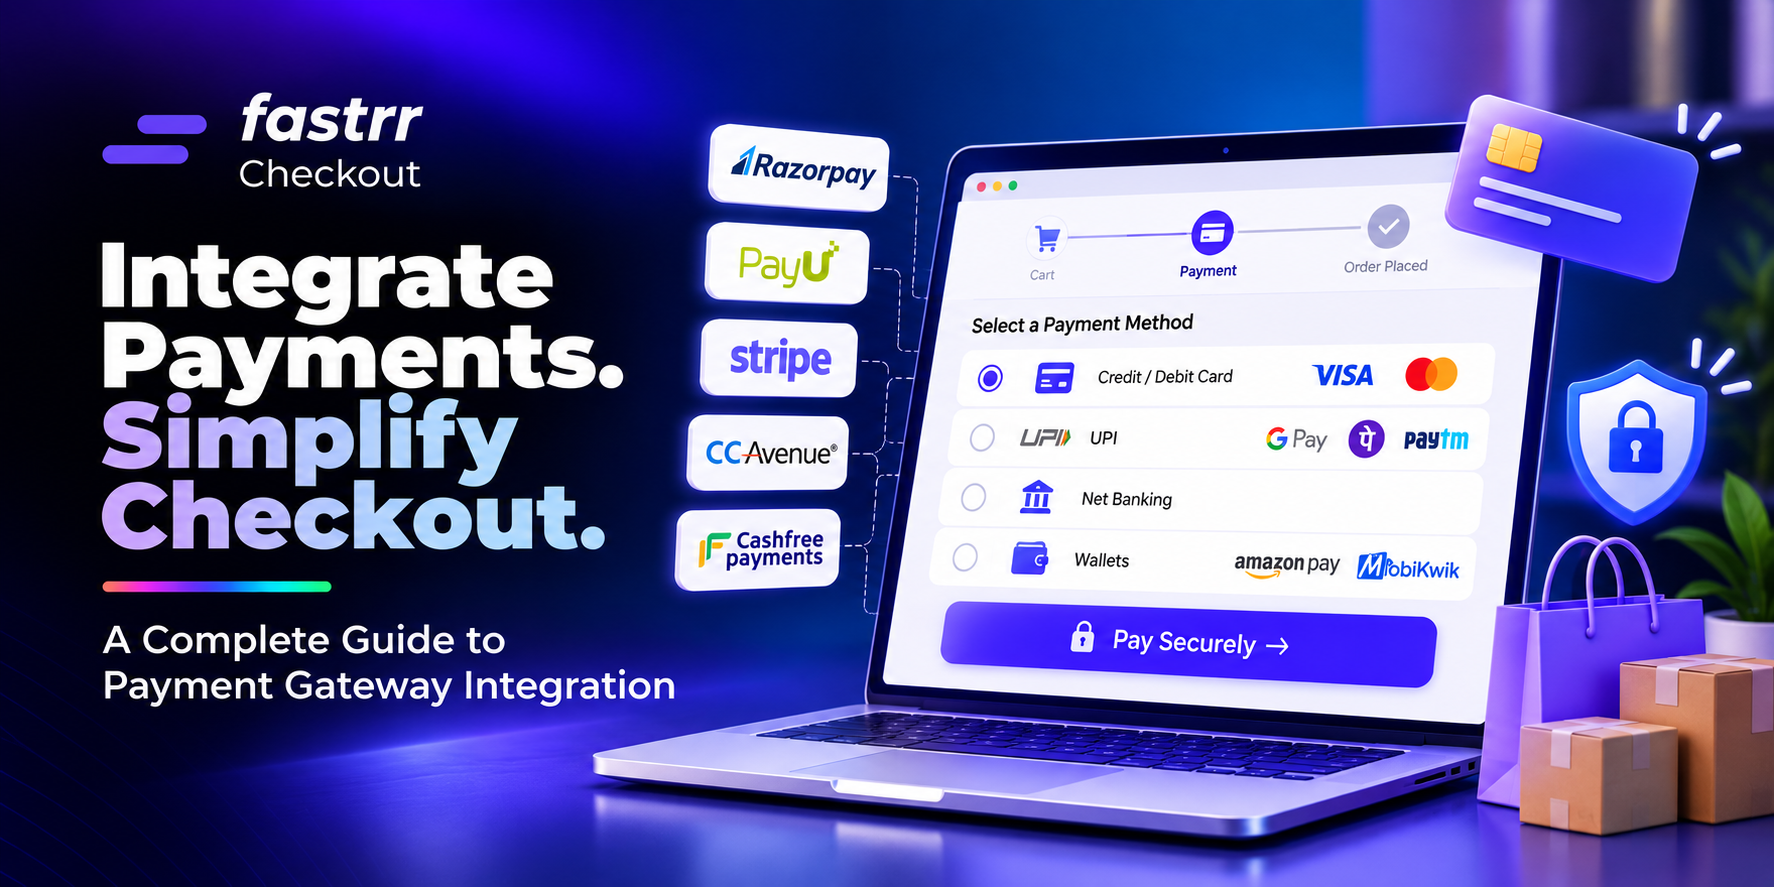
Payment gateway integration connects an eCommerce website to a payment provider so customers can pay online using UPI, cards, net banking and wallets. Shopify and WooCommerce stores can typically integrate through apps or plugins, while custom websites use checkout SDKs and server APIs. A reliable integration requires server-side order creation, payment verification, callbacks, webhooks, refund handling and reconciliation. Test successful, failed, pending and duplicate transactions before going live. fastrr Checkout can further simplify the purchase journey while the payment gateway continues to process transactions.
On this page
A shopper fills the cart, taps “Pay” on UPI and sees the money leave their account. Your store, though, shows the order as “pending” and never sends a confirmation. The shopper raises a complaint, your team checks three dashboards, and the order ships two days late.
That’s almost never the gateway’s fault. It’s usually a gap in the payment gateway integration: a missing webhook, a callback the store trusted blindly, or an order that was never marked paid. These gaps cost you orders, support hours and trust.
This guide walks merchants and developers through the full job: prerequisites, the Shopify and WooCommerce paths, custom website integration, test mode, callbacks and webhooks, payment verification, refunds and a go-live checklist. It’s written for Indian D2C stores, but the logic applies everywhere.
What Is Payment Gateway Integration?
Payment gateway integration is the process of connecting your ecommerce website’s checkout to a payment gateway so the site can accept online payments, confirm them and update orders automatically. The gateway securely passes the payment to banks and card networks, then tells your store whether it succeeded.
A complete integration does five jobs:
- Creates a payment request for the exact order amount.
- Shows the shopper a secure payment screen.
- Receives the result through a callback and a webhook.
- Verifies that result on your server before marking the order paid.
- Handles refunds and matches settlements to orders.
In India, most online stores use a payment aggregator that also provides the gateway technology. If you’re unsure where one ends and the other begins, read our explainer on payment gateway vs payment aggregator. For a wider primer, our guide to ecommerce payment gateways covers the basics.
How Payment Gateway Integration Works
Here’s what happens between “Place order” and “Order confirmed” in a well-built integration.
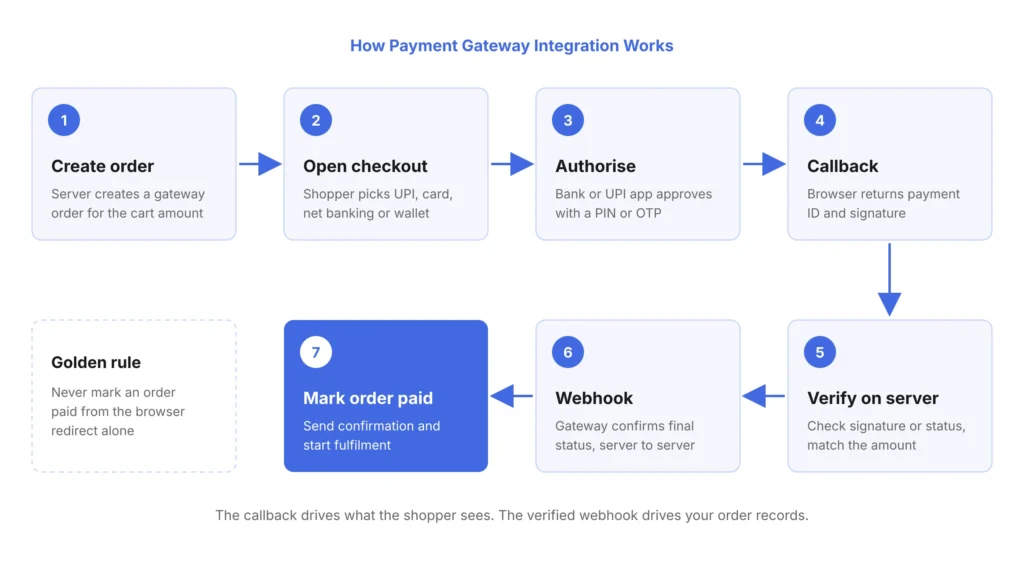
- Order created on your server. Your backend creates an order with the gateway for the cart amount and gets back a gateway order ID.
- Checkout opens. The shopper sees the gateway’s payment screen, or your embedded checkout, and chooses UPI, card, net banking, wallet or EMI.
- Authorisation. The gateway sends the payment to the card network, UPI switch or bank, and the shopper completes any authentication, such as a UPI PIN or card OTP.
- Callback. The shopper’s browser returns to your site with a payment ID and a signature.
- Server verification. Your server checks the signature, or fetches the payment status from the gateway’s API, and confirms the amount matches the order.
- Webhook. The gateway separately calls your server with the final payment event. This is your safety net if the shopper closed the tab.
- Order update. Only after verification do you mark the order paid, send the confirmation and start fulfilment.
The key idea: the browser callback tells you what probably happened; the verified server-side check tells you what actually happened.
Types of Payment Integration: Which One Fits Your Store?
There are four common ways to integrate a payment gateway into a website. Your platform and team usually decide the choice for you.
| Integration type | How it works | Best for | Dev effort |
|---|---|---|---|
| Platform app or plugin | Install the gateway’s Shopify app or WooCommerce plugin and add API keys | Shopify and WooCommerce stores | Low |
| Hosted or redirect checkout | Shopper is sent to the gateway’s payment page, then back to your site | Simple custom sites, quick launches | Low to medium |
| Embedded checkout (SDK) | Gateway’s checkout opens as a popup or inline form on your site | Custom sites that want shoppers to stay on-site | Medium |
| Server-to-server API | Your own UI collects payment details and calls the gateway’s APIs | Large businesses with PCI-DSS compliance in place | High |
For most Indian D2C brands, the first three are enough. A full server-to-server integration means you handle card data yourself, which brings heavy security and compliance work. Most stores don’t need it.
Prerequisites Before You Integrate a Payment Gateway
Gateways check your business and your website before they activate live payments. Sort these out first and onboarding moves much faster.
Business and KYC Documents
Expect to share your business PAN, GST details where applicable, business registration proof, a current bank account for settlements and the authorised signatory’s KYC. The exact list varies by business type and gateway, so check your provider’s onboarding page.
Website Readiness
Gateways review your live website. Make sure it has:
- Real products with clear prices in INR.
- Terms and conditions, privacy policy, refund and cancellation policy, and shipping policy pages.
- Contact details: email, phone and a business address.
- HTTPS across the whole site.
- A working cart and checkout flow.
Compliance Basics
Under the RBI’s guidelines on regulation of payment aggregators and payment gateways, merchant sites must not save customer card data. In practice, let the gateway’s checkout collect card details and never log or store them on your servers. Our guide to online payment security covers the wider security basics.
Technical Setup
Create separate test and live accounts or modes in the gateway dashboard. Store API secrets in environment variables or a secrets manager, never in front-end code or your Git repository.
How to Integrate a Payment Gateway on Shopify
Shopify handles the checkout page, so your job is mainly to connect and configure a provider. Shopify Payments isn’t available to stores based in India, so Indian merchants use third-party providers.
Steps to Add a Payment Gateway on Shopify
- Sign up with a gateway that supports Shopify and complete its KYC.
- In Shopify admin, go to Settings > Payments.
- Choose to add a payment provider and search for your gateway. Many Indian gateways are now installed as Shopify payment apps.
- Connect your gateway account or enter its credentials, then choose which payment methods to show.
- Turn on test mode if the provider offers one, and place test orders.
- Switch the provider to live mode and place one small real order.
Shopify’s help centre explains the options for third-party payment providers, including direct providers, where shoppers pay on your store, and external providers, where they pay on a hosted page. Shopify also charges a third-party transaction fee on these payments, which depends on your plan, so factor it into your cost comparison.
Testing on Shopify
Shopify offers a test payment gateway that simulates transactions without charging anyone. You can only test once you’re on a paid plan, and shoppers can’t place live orders while your providers are in test mode, so test before launch or during a quiet window.
Want to compare payment gateways for Shopify before you pick one? Our list of ecommerce payment gateways to choose for your business is a good starting point.
How to Integrate a Payment Gateway on WooCommerce
WooCommerce runs on your own WordPress server, so you have more control and more responsibility.
Steps to Add a Payment Gateway on WooCommerce
- Install the gateway’s official WooCommerce plugin from the WordPress plugin directory or the gateway’s site. Avoid unofficial or nulled plugins.
- Go to WooCommerce > Settings > Payments and enable the gateway.
- Paste your test mode API key and secret.
- In the gateway dashboard, add the webhook URL the plugin gives you, select the payment and refund events, and set a webhook secret.
- Place test orders covering success, failure and refunds.
- Replace test keys with live keys, update the webhook to live mode, and place a small real order.
WooCommerce Gotchas
- Caching plugins can break checkout or webhook endpoints. Exclude the cart, checkout, my-account and webhook URLs from page caching.
- Firewalls and security plugins sometimes block webhook calls. Check your server logs if orders stay “pending payment”.
- Plugin updates can change settings. Test checkout after every gateway or WooCommerce update.
Our roundup of payment plugins for WordPress covers options for WordPress and WooCommerce stores.
How to Integrate a Payment Gateway in a Custom Website
For a custom-built store, you’ll work with the gateway’s checkout SDK and server APIs. Names differ by provider, but the pattern is the same almost everywhere.
1. Set Up Test Keys and Environments
Get your test key ID and secret from the gateway dashboard. Keep separate configs for test and production, and make it impossible to mix test keys with the live environment.
2. Create the Order on Your Server
When the shopper clicks “Pay”, your backend calls the gateway’s orders API with the amount, currency and your internal order ID as a reference. Many gateways expect the amount in the smallest unit, so Rs 499 becomes 49900 paise. Never accept the amount from the browser; calculate it from your own cart data.
3. Open the Checkout
Pass the gateway order ID and your public key to the front-end, and open the gateway’s checkout. Prefill the shopper’s name, email and phone to cut friction.
4. Handle the Callback
After payment, the gateway returns a payment ID, the order ID and usually a signature to your success handler or redirect URL. Treat this as a claim, not proof. Shoppers can close the tab, lose network or tamper with browser data.
5. Verify the Payment on Your Server
Your server should confirm every payment before marking the order paid:
- Recompute the signature using your secret and compare it with the one received, or
- Fetch the payment or order from the gateway’s API and check its status.
- In both cases, confirm the amount and currency match your order.
6. Set Up Webhooks
Webhooks are server-to-server notifications the gateway sends when something happens: payment captured, payment failed, refund processed. They’re what saves you when the callback never arrives.
Build your webhook endpoint to:
- Verify the signature using the raw request body and your webhook secret.
- Be idempotent. Gateways can send the same event more than once, so store the event ID and skip duplicates.
- Handle any order. Events can arrive out of sequence, so check the current order state before you change it.
- Respond fast. Return a 2xx status quickly and do heavy work, such as sending emails, in a background job.
Razorpay’s documentation on validating webhooks is a clear example of this pattern. It uses an HMAC SHA256 signature in a request header and a unique event ID for spotting duplicates.
Here’s a simplified Node.js example of the signature check. Header names and payload formats vary by gateway, so follow your provider’s docs.
const crypto = require("crypto");

function isValidWebhook(rawBody, signatureHeader, webhookSecret) {
  const expected = crypto
    .createHmac("sha256", webhookSecret)
    .update(rawBody)
    .digest("hex");
  const a = Buffer.from(expected);
  const b = Buffer.from(signatureHeader || "");
  return a.length === b.length && crypto.timingSafeEqual(a, b);
}
7. Update the Order and Fulfil
Once the payment is verified, mark the order paid, send the confirmation by email, SMS or WhatsApp, and push it to your shipping workflow. If the payment stays pending, show the shopper a clear message and keep checking for the webhook instead of creating a duplicate order.
Callbacks vs Webhooks: What’s the Difference?
Developers often mix these up. You need both.
| Callback (redirect or handler) | Webhook | |
|---|---|---|
| Sent to | The shopper’s browser, then your site | Your server, directly from the gateway |
| Depends on the shopper | Yes: fails if they close the tab or lose network | No |
| Speed | Instant | Usually within seconds, sometimes delayed |
| Main use | Showing the success or failure page | Reliable order updates, refunds, automation |
| Must be verified | Yes | Yes |
Use the callback for the shopper’s experience and the webhook for your records. If the webhook hasn’t arrived when the shopper lands on the success page, call the gateway’s payment status API to confirm.
How to Test Your Payment Integration in Test Mode
Test mode lets you run the full payment flow with simulated money. Most gateways provide test cards, test UPI IDs and simulated bank pages. Don’t stop at one successful payment. Run every scenario below:
| Test scenario | What should happen |
|---|---|
| Successful UPI and card payment | Order marked paid once, one confirmation sent |
| Failed payment | Order stays unpaid, shopper sees a retry option |
| Shopper closes the payment window | Cart is kept, no paid order is created |
| Callback lost, webhook arrives | Order still marked paid through the webhook |
| Same webhook received twice | No duplicate order, email or stock deduction |
| Pending UPI payment that succeeds later | Order updates when the final status arrives |
| Amount changed in the browser | Server rejects the mismatch |
| Full and partial refund | Refund status syncs to the order |
Watch your logs while you test. Every payment should leave a clear trail from order creation to final status.
How to Handle Refunds
Refunds are part of the integration, not an afterthought. Decide upfront how your team will issue them.
- Dashboard refunds work for low volumes. Support staff refund from the gateway dashboard, and a refund webhook updates the order.
- API refunds suit higher volumes. Your order system or platform triggers the refund, so stock, accounting and customer emails stay in sync.
- Partial refunds cover a single returned item from a multi-item order. Test them, because some plugins handle them differently from full refunds.
- COD refunds don’t go through the gateway at all. You’ll need a separate process, such as bank transfer or UPI payouts.
Every refund should map back to the original payment ID. That’s what makes month-end matching possible. Our guide to ecommerce payment reconciliation shows how to match payments, refunds and settlements without spreadsheets taking over your week.
Go-Live Checklist for Payment Gateway Integration
Before you switch on live payments, run through this checklist.
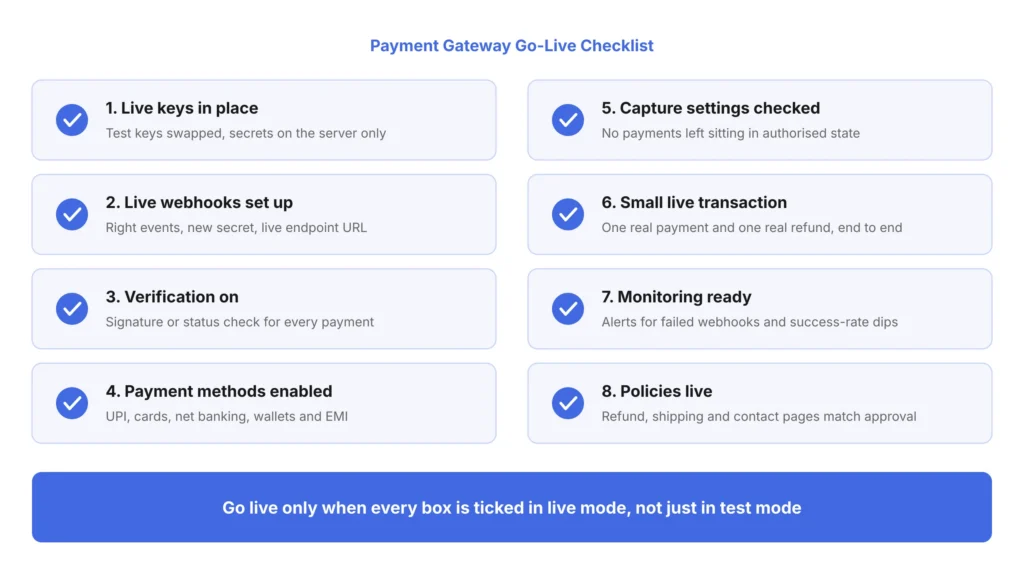
- Live keys in place. Test keys replaced everywhere, with secrets stored only on the server.
- Live webhooks configured. Webhooks set up again in live mode, with the right events and a new secret.
- Verification on. Signature or API status checks running for every payment.
- Payment methods enabled. UPI, cards, net banking, wallets and EMI switched on as planned.
- Capture settings checked. Payments auto-captured, or captured by your system, so they don’t stay authorised and lapse.
- Small live transaction. One real payment and one real refund completed end to end.
- Monitoring ready. Alerts for failed webhooks and a drop in payment success rate.
- Policies live. Refund, shipping and contact pages match what the gateway approved.
After launch, track your payment success rate by method and bank. If it dips, our guide to improving ecommerce payment success rate and our playbook on failed payment recovery will help.
Common Payment Integration Mistakes to Avoid
These are the issues that most often turn into “payment done, order missing” tickets:
- Trusting the redirect alone. Without server verification, lost callbacks mean lost orders and tampered callbacks mean free orders.
- No webhooks. UPI payments often finish after the shopper has left the page. Webhooks catch them.
- Not handling duplicates. Retries from the gateway can create duplicate orders or double stock deductions.
- Exposing secrets. API secrets in JavaScript or public repositories are a serious security risk. Rotate them immediately if they leak.
- Skipping failure tests. Most bugs hide in failed, pending and cancelled payments, not successful ones.
- Ignoring chargebacks. Keep proof of delivery and order records linked to payment IDs. Our explainer on chargebacks covers how disputes work.
Should You Use Payment Integration Services?
Payment integration services are agencies or developers who build and maintain the integration for you. On Shopify, you rarely need one, since the provider’s app does the heavy lifting. On WooCommerce, a developer helps if you have custom plugins, caching or a complex refund flow.
For custom websites and apps, an experienced developer is worth it. Ask any partner to show how they handle webhook verification, idempotency, refunds and reconciliation, not just a successful test payment.
Where fastrr Checkout Fits Into Your Payment Stack
Integrating a gateway gets payments working. Getting shoppers to complete them is a separate job. fastrr Checkout, powered by fastrr, is a one-click checkout layer for Shopify, WooCommerce and custom stores. It isn’t a payment processor: payments are still processed by a payment gateway or aggregator. [[VERIFY: confirm how fastrr Checkout connects to payment gateways, which gateways are supported, and whether merchants can use their existing gateway account]]
On top of that payment layer, fastrr Checkout adds prefilled addresses, multiple payment options, payment mode-specific discounts and automatic payment mode switching, which steers shoppers to a more stable option when a gateway or payment mode is failing often. For COD-heavy stores, it supports COD charges, COD-to-prepaid nudges and limits on repeat COD orders. See the full list of fastrr Checkout features or explore fastrr Checkout for your store.
Conclusion
Payment gateway integration isn’t finished when the first test payment goes through. A reliable setup creates orders on the server, verifies every payment, listens to webhooks, handles duplicates and refunds, and ties each rupee back to an order.
Shopify and WooCommerce stores can do most of this through the gateway’s app or plugin and a careful round of testing. Custom websites need a developer who follows the pattern in this guide. Either way, test the failures as hard as the successes, go live with a small real transaction, and keep watching your payment success rate after launch.
Frequently asked questions
What is payment gateway integration?
Payment gateway integration is the process of connecting your website's checkout to a payment gateway so it can accept online payments. It covers creating payment requests, showing a secure payment screen, verifying results and updating orders. It also includes refunds and webhooks.
How do I integrate a payment gateway in my website?
Sign up with a gateway, complete KYC and get test API keys. On Shopify or WooCommerce, install the gateway's app or plugin and add your keys. On a custom website, create orders on your server, open the gateway's checkout, verify payments and set up webhooks, then test fully before switching to live keys.
Which payment gateways work with Shopify in India?
Shopify supports a range of third-party providers in India, and many Indian gateways offer Shopify payment apps. Check the provider list under Settings > Payments in your Shopify admin for current options. Also compare Shopify's third-party transaction fee for your plan alongside the gateway's own fees.
How long does payment gateway integration take?
A Shopify or WooCommerce integration can often be configured in a day once your gateway account is approved. Account approval and KYC can take longer, depending on the gateway and your documents. A custom website integration usually takes longer because it needs development, webhooks and thorough testing.
Do I need PCI DSS compliance to integrate a payment gateway?
If you use a hosted or embedded checkout, the gateway collects card details and carries most of the PCI DSS burden. If your own servers collect or handle card data, you take on much stricter compliance requirements. Under RBI rules, merchant sites must not store customer card data either way.